
How to clean your car floor mats (rubber edition).
December 23, 2022 3 min read
Picture this: you’ve planned a fun day out at the beach. It’s also been ages since you’ve gone on a holiday with your friends. The best part is? They’ve voted you as the designated driver for the trip.
Well, that’s all perfectly fine, and you’ve even volunteered your brand new four-wheel drive that you just bought a few weeks ago. Fast forward, and everyone is having an absolutely good time and…
Oh,no.
You’ve completely forgotten how messy beach trips can get!
Your eyes widen in horror as your friends start piling into your car, bringing in clumps of wet sand, dirt, and grime into the backseat. At this point, your rubber car floor mats are nearly covered with a layer of debris and sticky remnants of salt water.
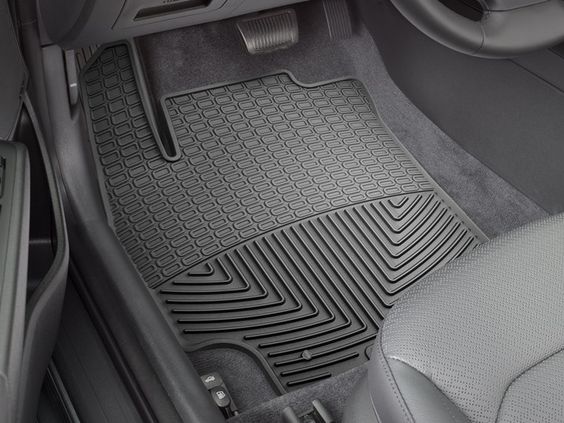
(Assuming of course that your brand-new car floor mats are made of rubber. But if they’re thetraditional coil mats kind, then check outdifferent methods to clean your coil car floor mats here.)
So, before you’re overwhelmed with panic on how to get rid of all that mess, here are a few suggestions for getting your rubber car floor mats to look brand new again.
Read on to learn more about how to clean your rubber car floor mats!
What you need to clean rubber car mats:
- Heavy duty cleaners
- Wheel brush (or any sturdy scrubber brush)
- Strong protectant coating (you can tryTRAPO Cleaning Pack)
- Agood quality microfibre cloth
Step-by-step instructions:
-
Firstly, remove your rubber car floor mats from your car. Adjust your seats backward to make this step easier.
-
Find a spacious outdoor area to lay your dirty car mats. The sidewalk or the floor of your garage can be ideal spaces.
-
Spray your rubber car mats with a powerful stream of water to loosen up any stubborn debris or grime off the surface. Ensure that you remove as much of the soil as possible during this step.
-
Next, use a good quality car mat cleaning solution of your choice. Coat your rubber car mats liberally with the solution and allow 3-5 minutes for the solution to do its magic and dissolve leftover debris (10 minutes if the stains are super stubborn).
-
Use a bristled brush to scrub your rubber car mats. Make sure to reach into every nook and cranny for a deeper clean!
-
Rinse your car mats with water. Check to see if there are any spots that you might’ve left out during the scrubbing step. If you have, repeat Step 3 to Step 5 again.
- Once you find your car mats to be sufficiently cleaned, we recommend that you restore and protect them. Mist a protectant coating and use yourdurable microfibre cloth to polish your car mats thoroughly. During this step, you’ll notice that your rubber car mats are shinier and have developed a deeper, richer color like they did when you’ve just bought them.
Conclusion
And you’re done! Cleaning up anything properly requires a bit of time and effort, but take it as an investment to keep your space hygienic. However, if your schedule is just downright busy, how about a much faster and easier option?
Check out theseultra-hygienic car floor mats that only take less than 20 minutes to wash and dry! Quick and effortless.
Leave a comment
Comments will be approved before showing up.